The last time my client uses Windows Small Business Server, I had them bought Trend Micro Client Server Messaging Security for Small and Medium Business. It was quite costly; around $1200 for 15 users includes 2 years maintenance. It made sense then, because his settings makes it easy to manage and maintain and virus protect all the PCs in the network from one centralized place. Moreover, it also has virus and anti spam for Exchange.
My new client has only Windows Exchange 2010 that’s running in data center. Having an “enterprise” (read expensive) spam and anti virus was not an option for him. The only way to cut costs is by using Linux or the likes. Alas, the client just wants Exchange somehow. So I get to think, why don’t we have Linux box running Postfix as a front-end Mail Transfer Agent (MTA) to MS Exchange 2010. Below is the diagram of what I’m trying to achieve.

Installing and configuring Postfix
So the first thing that needs to be done is to have a Linux box that’s ready to accept incoming mail and run diagnostic on it. I’ll be using my favorite distribution, Ubuntu. I’ll assume that you have one already installed.First, let’s intall Postfix by running the command below. Since we’ll be using it only to forward emails to Exchange, it doesn’t really matter what configuration to pick. Simply accept the defaults.
user@mydomain:~$ sudo apt-get install postfix
user@mydomain:~$ cat /etc/postfix/main.cf
mydomain = mydomain.com
myhostname = postfix.mydomain.com
mydestination = mydomain.com, myotherdomain.com
mynetworks = 127.0.0.0/8 [::ffff:127.0.0.0]/104 [::1]/128
relay_domains = $mydestination
smtpd_recipient_restrictions = permit_mynetworks,\
 reject_unauth_destination,reject_invalid_hostname,\
 reject_unauth_pipelining,reject_non_fqdn_sender, \
 reject_unknown_recipient_domain,reject_unknown_sender_domain
transport_maps = hash:/etc/postfix/transport
local_recipient_maps =
The next thing to do is to configure the transport DB. Edit /etc/postfix/transport and add each domain that you want to forward. Here’s a sample how the file look like.
user@mydomain:~$ cat /etc/postfix/transport
mydomain.com      smtp:[10.10.10.50]
myotherdomain.com     smtp:[10.10.10.50]
user@mydomain:~$ sudo postmap /etc/postfix/transport
user@mydomain:~$ sudo postfix reload
Configure SpamAsassin
Now that you’ve made sure that Postfix is working fine and emails received to it is forwarded to Exchange, it’s time to configure it to start filtering email. Install the necessary packages by running the following commands:user@mydomain:~$ sudo apt-get install amavisd-new spamassassin clamav-daemon user@mydomain:~$ sudo apt-get install libnet-dns-perl pyzor razor user@mydomain:~$ sudo apt-get install arj bzip2 cabextract cpio file gzip user@mydomain:~$ sudo apt-get install lha nomarch pax rar unrar unzip zip user@mydomain:~$ sudo adduser clamav amavis user@mydomain:~$ sudo adduser amavis clamav
user@mydomain:~$ cat /etc/default/spamassassin
ENABLED=1
CRON=1
user@mydomain:~$ sudo /etc/init.d/spamassassin start
Configure Amavis
Amavis is the anti virus that we’ll use. It works in conjunction with SpamAsassin. Now that it is installed, we’ll just need to enable it. Edit /etc/amavis/conf.d/15-content_filter_mode. Uncomment the 2 config to enable it. Your file should look like below:
user@mydomain:~$ cat /etc/amavis/conf.d/15-content_filter_mode
use strict;

# You can modify this file to re-enable SPAM checking through spamassassin
# and to re-enable antivirus checking.

#
# Default antivirus checking mode
# Please note, that anti-virus checking is DISABLED by
# default.
# If You wish to enable it, please uncomment the following lines:


@bypass_virus_checks_maps = (
   \%bypass_virus_checks, \@bypass_virus_checks_acl, \$bypass_virus_checks_re);


#
# Default SPAM checking mode
# Please note, that anti-spam checking is DISABLED by
# default.
# If You wish to enable it, please uncomment the following lines:


@bypass_spam_checks_maps = (
   \%bypass_spam_checks, \@bypass_spam_checks_acl, \$bypass_spam_checks_re);

1;  # ensure a defined return
user@mydomain:~$ cat /etc/amavis/conf.d/05-node_id
$myhostname = "postfix.mydomain.com";
user@mydomain:~$ cat /etc/amavis/conf.d/50-user
$final_virus_destiny      = D_PASS; # (defaults to D_BOUNCE)
$final_spam_destiny       = D_PASS; # (defaults to D_REJECT)
user@mydomain:~$ sudo /etc/init.d/amavis restart
user@mydomain:~$ telnet localhost 10024
Trying 127.0.0.1...
Connected to localhost.
Escape character is '^]'.
220 [127.0.0.1] ESMTP amavisd-new service ready
^]

telnet> quit
Connection closed.
Connect Amavis and Postfix
Now that we have confirmed that Postfix is working fine and Amavis is
also working fine, let’s have them work together. The first command
tells Postfix to use Amavis for content filtering. Then you also need to
edit /etc/postfix/master.cf which I’ve shown the relevant changes
below. Restart Postfix after everything is done.
If you check the logs, you should see log messages resembling the below:
Now do check your Outlook and see if you receive a new message with
subject starting with “*****SPAM*****” (if you’ve configured the
optional step). Next up is configuring MS Exchange 2010 so that it’ll
deliver the mail to “Junk E-Mail” folder.
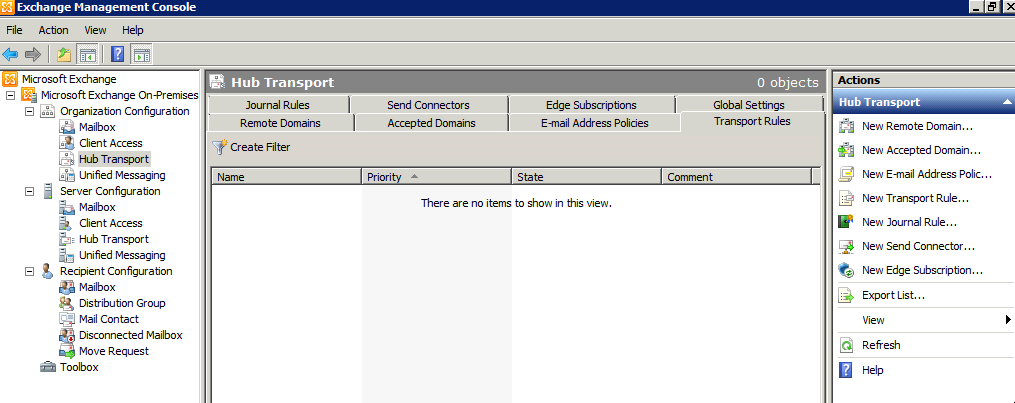
On your Exchange Management Console, browse to Microsoft Exchange On-Premises. Then expand Organization Configuration. Then select Hub transport. Navigate to Transport Rules tab. You should see an empty list like in the screenshot below.


user@mydomain:~$ sudo postconf -e "content_filter = smtp-amavis:[127.0.0.1]:10024"
user@mydomain:~$ cat /etc/postfix/master.cf
pickup    fifo  n       -       -       60      1       pickup
         -o content_filter=
         -o receive_override_options=no_header_body_checks
smtp-amavis     unix    -       -       -       -       2       smtp
        -o smtp_data_done_timeout=1200
        -o smtp_send_xforward_command=yes
        -o disable_dns_lookups=yes
        -o max_use=20

127.0.0.1:10025 inet    n       -       -       -       -       smtpd
        -o content_filter=
        -o local_recipient_maps=
        -o relay_recipient_maps=
        -o smtpd_restriction_classes=
        -o smtpd_delay_reject=no
        -o smtpd_client_restrictions=permit_mynetworks,reject
        -o smtpd_helo_restrictions=
        -o smtpd_sender_restrictions=
        -o smtpd_recipient_restrictions=permit_mynetworks,reject
        -o smtpd_data_restrictions=reject_unauth_pipelining
        -o smtpd_end_of_data_restrictions=
        -o mynetworks=127.0.0.0/8
        -o smtpd_error_sleep_time=0
        -o smtpd_soft_error_limit=1001
        -o smtpd_hard_error_limit=1000
        -o smtpd_client_connection_count_limit=0
        -o smtpd_client_connection_rate_limit=0
        -o receive_override_options=no_header_body_checks,no_unknown_recipient_checks
user@mydomain:~$ sudo /etc/init.d/postfix reload
Test if everything is working as it should
Now let’s test sending spam email by hand using telnet. We’ll be using Generic Test for Unsolicited Bulk Email (GTUBE) from SpamAsassin. What’s expected is that we’ll receive email from Exchange through either Outlook or Outlook Web Access. Here’s the transcript of my spam email test.
user@mydomain:~$ telnet localhost 25
Trying 127.0.0.1...
Connected to localhost.
Escape character is '^]'.
220 postfix.mydomain.com ESMTP Postfix (Ubuntu)
ehlo postfix.mydomain.com
250-postfix.mydomain.com
250-PIPELINING
250-SIZE 10240000
250-VRFY
250-ETRN
250-STARTTLS
250-ENHANCEDSTATUSCODES
250-8BITMIME
250 DSN
mail from: somedude@spammer.com
250 2.1.0 Ok
rcpt to: user@mydomain.com
250 2.1.5 Ok
data
354 End data with .
Subject: Test sending spam email.

This email should be marked as spam because it contains this line

XJS*C4JDBQADN1.NSBN3*2IDNEN*GTUBE-STANDARD-ANTI-UBE-TEST-EMAIL*C.34X

I should expect this to be delivered to Exchange.
.
250 2.0.0 Ok: queued as CDF272A80E20
quit
221 2.0.0 Bye
Connection closed by foreign host.
user@mydomain:~$ tail -f /var/log/syslog Apr 15 00:19:03 postfix.mydomain.com postfix/cleanup[6059]: CDF272A80E20: me ssage-id=<20130415071754 .cdf272a80e20="" postfix.mydomain.com=""> Apr 15 00:19:03 postfix.mydomain.com postfix/qmgr[5190]: CDF272A80E20: from=, size=552, nrcpt=1 (queue active) Apr 15 00:19:05 postfix.mydomain.com postfix/smtpd[6053]: disconnect from lo calhost[127.0.0.1] Apr 15 00:19:18 postfix.mydomain.com postfix/smtpd[6069]: connect from local host[127.0.0.1] Apr 15 00:19:18 postfix.mydomain.com postfix/smtpd[6069]: 404F42A80E2B: clie nt=localhost[127.0.0.1] Apr 15 00:19:18 postfix.mydomain.com postfix/cleanup[6059]: 404F42A80E2B: me ssage-id=<20130415071754 .cdf272a80e20="" postfix.mydomain.com=""> Apr 15 00:19:18 postfix.mydomain.com postfix/qmgr[5190]: 404F42A80E2B: from = , size=1294, nrcpt=1 (queue active) Apr 15 00:19:18 postfix.mydomain.com postfix/smtpd[6069]: disconnect from lo calhost[127.0.0.1] Apr 15 00:19:18 postfix.mydomain.com amavis[5485]: (05485-06) Passed SPAM, L OCAL [127.0.0.1] [127.0.0.1] -> , quarantine: j/spam-jq58tLC6RLYB.gz, Message-ID: <20130415071754 .cdf272a80e20="" postfix.mydomain.com="">, mail_id: jq58tLC6RLYB, Hits: 1000.207, size: 552, que ued_as: 404F42A80E2B, 14398 ms Apr 15 00:19:18 postfix.mydomain.com postfix/smtp[6065]: CDF272A80E20: to=, relay=127.0.0.1[127.0.0.1]:10024, delay=93, delays=79/0.0 1/0.01/14, dsn=2.0.0, status=sent (250 2.0.0 from MTA([127.0.0.1]:10025): 25 0 2.0.0 Ok: queued as 404F42A80E2B) Apr 15 00:19:18 postfix.mydomain.com postfix/qmgr[5190]: CDF272A80E20: remov ed Apr 15 00:19:18 postfix.mydomain.com postfix/smtp[6070]: 404F42A80E2B: to=, relay=10.10.10.50[10.10.10.50]:25, delay=0.21, delays=0.0 1/0.01/0.01/0.18, dsn=2.6.0, status=sent (250 2.6.0 <20130415071754 .cdf272a="" 80e20="" postfix.mydomain.com=""> [InternalId=21972] Queued mail for delivery) Apr 15 00:19:18 postfix.mydomain.com postfix/qmgr[5190]: 404F42A80E2B: remov ed
Configuring Exchange 2010 to understand emails marked as spam from SpamAsassin
Exchange 2010 has some sort of mail filtering capability. In particular, it has spam confidence level; a number between -1 and 10. We’ll utilize that so that so that down stream, Exchange will work as intended (i.e. delivering junk mails to “Junk E-Mail” folder).On your Exchange Management Console, browse to Microsoft Exchange On-Premises. Then expand Organization Configuration. Then select Hub transport. Navigate to Transport Rules tab. You should see an empty list like in the screenshot below.
- Click on New Transport Rule from the menu on the right pane.
- Give it a descriptive name like Mark as spam. Then click Next
- On Conditions step, check “when the message header contains specific words
- Click on message header and put in “X-Spam-Flag”
- Click on specific words and put in “YES”. Then click Next.
- On Actions step, select “set the spam confidence level to value
- Click on “0” and change it to 6. MS Exchange 2010 has 6 as the highest confidence level that they’ll deliver. Otherwise, they’ll start quarantine
- Ater clicking Next, you’ll get the Exception step. There’s nothing to do on this step. Simply click Next
- On the last screen, simply click New button.
That’s it. You can try sending spam test email again. This time, you
should have the email delivered to your “Junk E-Mail” folder instead of
your inbox in your Outloo.
From http://www.microshell.com/sysadmin/configuring-postfix-spamasassin-amavis-as-front-end-to-ms-exchange-2010/7/


0 Comments
Post a Comment